How to make sea fishing rigs – 5 easy rigs
Of course you can buy your sea fishing rigs ready made, but it’s much more rewarding to catch fish with a rig you tied yourself. The following five rigs are pretty much the only rigs I use for shore fishing and they’re all incredibly simple. Read on, and start tying!
*Unless stated otherwise the knot used in this article is the uni knot.
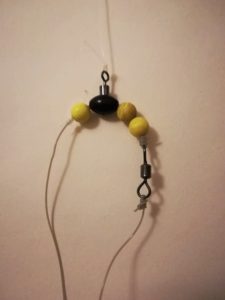
1. Flapper rig
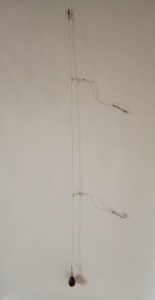
The flapper rig is one the most effective sea fishing rigs if you’re fishing over clean ground. A lot of people use trapped swivels when tying flapper rigs, but I prefer to use a dropper loop. The ‘boom’ the loop creates keeps the snood away from the rig body which limits tangles. In situations where you have to use thinner diameter hooklengths, trapped swivels might be better as they prevent line twist. With lines above 15lbs breaking strength I rarely have this problem.
Components: size 1 swivel, lead clip, 70lbs rig body, 20lbs amnesia, 2 aberdeen hooks size 1 or 2.
Cut off about 5ft of rig body line. Shock leader line works fine. Asso shock leader is a good budget option. Tie one dropper loop about a feet from one end and another about a feet from the other end. Attach a swivel to one end and a lead clip to the other end. Tie the hooks to about a feet of amnesia and tie each hooklength to a dropper loop.
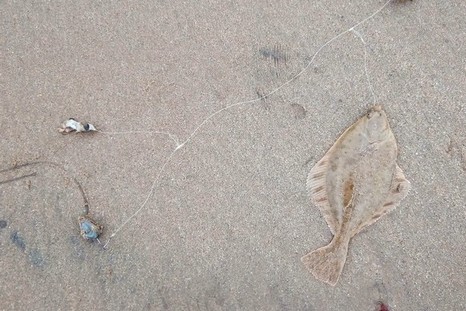
Like with all sea fishing rigs it’s worth experimenting with it. You can adjust the length of the snoods or add more hooks. Just make sure the hooks can’t reach each other because that can lead to tangles. More hooks will mean the rig body will be longer and therefore more difficult to cast. The flapper rig is not very aerodynamic and is most suited for fishing short- to mid-range. Of all the sea fishing rigs, it’s the rig I use most of the time if I’m targeting flatfish. It’s also a good ‘scratching’ rig for when there are mostly smaller fish around. If I’m targeting bigger species, I prefer to use the semi-fixed pulley rig, see below.
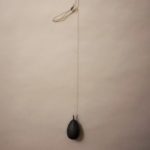
2. Running ledger rig
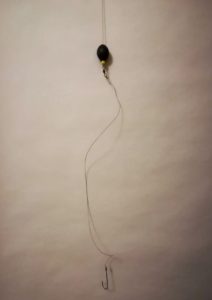
The running ledger rig is a free running rig. Like the flapper rig, the running ledger rig is most suited for fishing at close range. Because the line runs freely the bite registration is excellent. And because the fish doesn’t feel any resistance – apart from the pressure on the line – it is the perfect rig to target the shyer species. Another advantage is that the weight is above the fish when you reel in, so there are less chances of it getting snagged. Unlike most sea fishing rigs the running ledger is not a self-hooking rig, so you have to set the hook by striking.
Components: swivel, drilled bullet weight, bead, amnesia hooklength, hook.
You can use any weight for this rig, using a slider or a running ledger boom, but I prefer a drilled bullet because it can roll around freely without tangling.
Slide the lead on the mainline or shock leader, followed by a bead, tie it to a swivel and tie your hooklength to the other end. There are a lot of possible variations. You can trap the weight with a bead and a stop knot to make it into a self-hooking rig. You can also tie a three-way swivel a feet above the weight and add an extra hooklength.
The running ledger is an excellent rig for targeting bass, especially with bigger baits.
3. Float rig
As you can read in my article about saltwater float fishing, the float rig is useful in a lot of different scenarios.
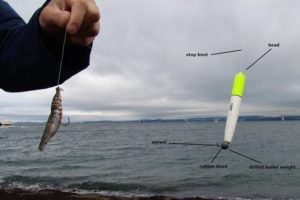
Components: Float, powergum stopknot, 2 beads, drilled bullet weight, swivel, hook.
The float rig is very similar to the running ledger rig. First tie a stop knot onto your line. Powergum is most suited for this, but you can also use regular mono. Then slide a bead up the line followed by the float. Then comes the drilled bullet weight followed by a bead, a swivel and your hooklength.
There are some situations where you might want to adjust this rig. When you’re casting against the wind there is a chance that the hook catches the line above the float. If that happens a lot, you can increase the distance between your float and your hook by adding an extra swivel about two feet above the weight. Then slide the float onto the line followed by a bead, and tie this to the swivel.
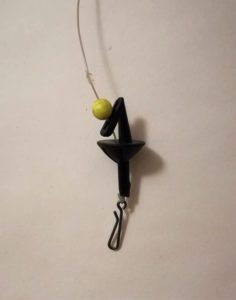
4. Rough ground rig
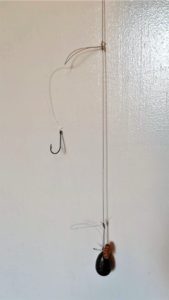
There’s rough ground and there’s rough ground. The following rig is the one I use in places where the chances of getting snagged are close to a hundred percent. This rig is fairly simple so there’s no point in pre-tying it.
Components: amnesia 20-30lbs, 10lbs line for weaklink, pannel pin, cube of cork
When you use mono straight through (30-40lbs) you can tie it directly from your mainline. Tie a dropper loop about 3 feet from the end of the line and tie a simple loop knot at the end. Tie your hooklength to the dropper loop, just like with a flapper rig. Then tie about 5 inches of 10lbs mono above the loop knot using a uni-knot and slide it down. Attach the weight to the other end of the thin line.
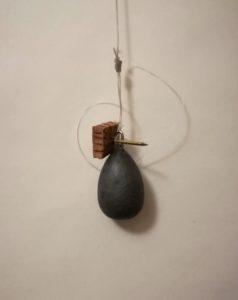
To make the rotten bottom pin*, cut a square of cork of about a centimetre wide and 2mm thick and stick the pin through it. Before you cast, stick the loop through the eye of your weight and trap it with the pin. Once your rig hits the water, the pin floats out. If you hook into a fish and your weight gets snagged the weak link will break. When you don’t have to cast further than say thirty yards, and fish with lightish weights you don’t even need a pin. If you are using a braid mainline (say 60-100lbs), tie the rig from 80lbs rig body line and tie a swivel onto the top end to attach your rig.
* There are a lot of different rotten bottom clips available, but for simplicity’s sake I stick to the DIY rotten bottom pin in this article.
Prepare and save time
To lose less time when you’re out fishing, it’s a good idea to prepare a bunch of pins and hooklengths so you can tie a new rig within minutes if your line snaps.
Environment
Some people use foam or plastic for their rotten bottom pins, but I would strongly advice you to use cork – there’s more than enough plastic in our oceans.
Lead is a highly poisonous material and lead weights are expensive. Therefore I use stone weights whenever possible. Not only is it better on your conscience, it can also save you hundreds of pounds a year.
5. Semi-fixed pulley rig
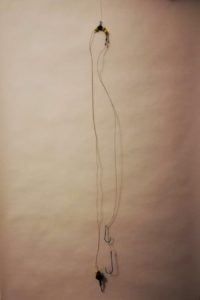
The pulley rig is one of the most popular sea fishing rigs. The basic pulley rig is very simple. Apart from the line and hooks it consists of two swivels and two beads. I do have a few problems with this rig though. One is that it’s prone to tangles and the other is that the hooking potential is far from optimal. But with a few adjustments you have the best all-round shore rig for bigger species.
Components: pulley bead, swivel, 3 beads, lead clip. 80lbs rig body, 30lbs amnesia hooklength, hook, mono stopknot.
First, tie a 2ft amnesia hooklength to one end of the swivel. Then tie a similar length of rig body line to the other end. Slide two beads onto the line (two beads help the line stand out more). Slide on the pulley bead and another bead behind it. Tie a stop knot behind the last bead. Tie a lead clip onto the other end of the rig body line. Done.
The stop knot basically turns this rig into a paternoster rig. A fixed rig has better hooking potential because there is less play. Bite registration is also a lot better. But when you hook into a fish, the pressure moves the knot and the rig still functions as a pulley rig. The best of both worlds.
Other adjustments
To improve distance and limit tangles even more I recommend using a breakaway impact shield. They look a bit bulky but they do work a dream.
In stead of a lead clip you can also use the weak link set-up I described earlier.
When using bigger baits it makes sense to use a pennel rig. It makes sure your bait doesn’t slide over your hook point and improves the chances of a hook up. Never use a pennel rig for rough ground though. You don’t want to lose a fish because one of the hooks gets snagged.
Keeping your rigs
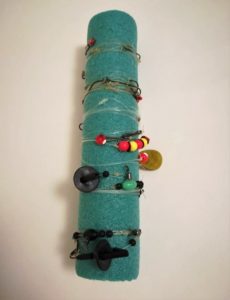
To keep my rigs safe and untangled I wind them around a piece of swimming noodle, using sewing pins to keep them in place
This article is merely a guide. The fun in rig building is adjusting the rigs to your own needs and the situations you come across.
If you have any tips on sea fishing rigs or if you simply want to share your experiences, please do so in the comment section below.
And if you’d like to receive an email every time I publish a new post, please subscribe to my newsletter. Tight lines!
Disclosure: if you purchase anything using the links in this blog post, I might make a commission. Affiliate programs and affiliations include, but are not limited to, the eBay Partner Network. It doesn’t cost you a penny more to buy via these affiliate links (and you don’t have to use them of course) but it helps me to keep this blog going. Thanks!
4 thoughts on “How to make sea fishing rigs – 5 easy rigs”
Some useful tips , I have not seen published elsewhere . In particular the stop knot on the pulley rig and the cork on the panel pin for the rotten bottom.
Just getting back into sea fishing , in Cornwall in the 60/70’s we always used the running ledger , nothing else . Bait clips were unheard of then .
Thanks! I do think a stop knot improves the hookup rate and the pulley effect remains the same with a decent fish on. Good luck with your fishing!
very good basic rigs just think a float stop is better than a stop knot for the float rig especially when fishing off pier and you constantly have to adjust depth of rig
Thanks! You can adjust the depth with the stop knot too (you can slide it up and down the line, just like the rubber float stops). My problem with float stops is that they can sometimes ‘catch’ on the eyes of the rod when casting or even underneath the coils on your spool. But when you don’t have to cast very far (like from a pier, as you pointed out) you don’t have that problem so float stops might be the easiest option. Tight lines!